| Darkrime Delves | ||||||||
|---|---|---|---|---|---|---|---|---|
| ||||||||
| Basic Info | ||||||||
| ||||||||
| Neighbor(s) | ||||||||
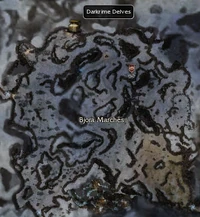
| Bjora Marches | ||||||||
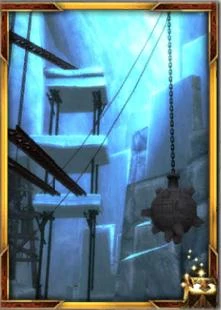
| Map | ||||||||
   (click to enlarge) | ||||||||

Location of Darkrime Delves
General Description[]
Darkrime Delves is a 3 level dungeon in the Far Shiverpeaks. It is located at the northern edge of the Bjora Marches. To fully explore this dungeon you have to take the quest The Misanthropic Jotun Principle from Einarr Frostcleft.
NPCs[]
- Collectors:
 20 Dobb
- Various:
Bestiary[]
Monsters[]
- Dragons
- 20 Chromatic Drake (levels 1 and 2)
- Dryders
- 24 Bloodtaint Dryder (level 1 and 2)
- 24 Dreadgaze Dryder (level 1 and 2)
- 24 Soulfire Dryder (level 1 and 2)
- 24 Terrorbond Dryder (level 2)
- Stone Summit
- 24 Stone Summit Carver (levels 1 and 2)
- 24 Stone Summit Crusher (level 1)
- 24 Stone Summit Healer (level 1)
- 24 Stone Summit Gnasher (level 2)
- Elementals
- 20 Icy Stalagmite (levels 1 and 2)
- 20 Shattered Elemental (levels 1 and 3)
- 20 Whirling Wisp (levels 1 and 3)
- Giants
- 24 Jotun Skullsmasher (levels 2 and 3)
- 28 Jotun Skullsmasher (levels 1, 2 and 3)
- 24 Jotun Bloodcurdler (level 3)
- 28 Jotun Bloodcurdler (levels 1, 2 and 3)
- 28 Jotun Bladeturner (levels 1, 2 and 3)
- 24 Jotun Mindbreaker (levels 1 and 3)
- 28 Jotun Mindbreaker (levels 1, 2 and 3)
- Nightmares
- 15 Scourge Vaettir (level 1)
- 20 Scourge Vaettir (level 1)
- 20 Shadow Vaettir (level 1)
- 15 Mist Vaettir (level 1)
- 20 Mist Vaettir (level 1)
- Incubus
- 20 Stormcloud Incubus (level 1 and 2)
Bosses[]
- Jotun
- 26 Havok-kin (two on level 1, one on level 2, one on level 3) → (Skull Crack)
- 28 Grelk Icelash (level 2) → (Skull Crack)
Boss-like foes[]
Pets[]
Rewards[]
- When opened, the Havok's Chest spawns 1 item for each player (2 in Hard Mode) from the following list:
| Unique items (Exclusive to this chest) |
Gold Items (Exclusive to this chest) |
Other Gold Items | Rare Materials | Other Items |
|---|---|---|---|---|
| Cobalt Staff Demon Tongue Scythe Stygian Reaver Violet Edge |
Polymock Piece: Naga Shaman | Diamond Ruby Sapphire Onyx Gemstone |
(none) |
- Completing this dungeon for the first time awards each player 1500 Norn reputation points (2250 in Hard Mode). (Subsequent completions award half the points.)
Notes[]
- Kolgrim Bainwight and Einarr Frostcleft will accompany you on the trip, but they are not allies and will not aid you in battle.
- To save time receiving the quest reward, wait out the next mission timer; when it expires, you will be taken directly to Einarr in Bjora Marches.
- The Jotun frequently use Giant Stomp, so Knockdown-protection skills are helpful, e.g. Ward of Stability or "Don't Trip!". Alternatively, Earthbind will cause the Jotun to knock each other out, leveling the playing field for the party.
- All of the bosses (including Havok) are Warriors, so anti-melee skills are especially helpful. Clumsiness and Blindness are particularly helpful here.
- There are relatively few melee-oriented foes in this dungeon; on the other hand, the many groups of Vaettir, Dryders and spellcasting Jotun make extensive hex removal advisable.
- The Jotun will fight with a number of the other foes (especially the Stone Summit), with the giants emerging victorious nearly all the time. You can wait out these battles (facing a weakened foe) or join in (for the extra experience and drops).
- Be careful not to rush: on the first level, Vaettir pop-up frequently; on the first two levels, the unwary could get smashed by various boulders rolling around; and on the third level, watch out for falling snow.
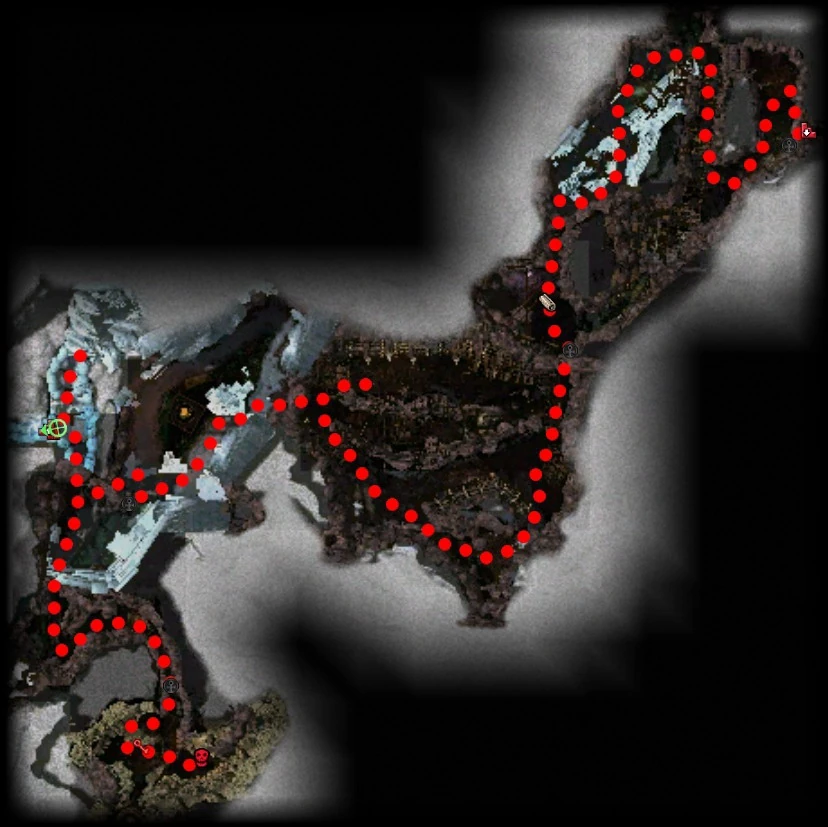
- The dungeon bosses on level 2 (Grelk Icelash) and level 3 (Havok himself) are surrounded by a dozen or so Jotun allies. The allies can be easily pulled. (It is possible to pull the bosses, but, as it is much more difficult, might not be worth the time.)
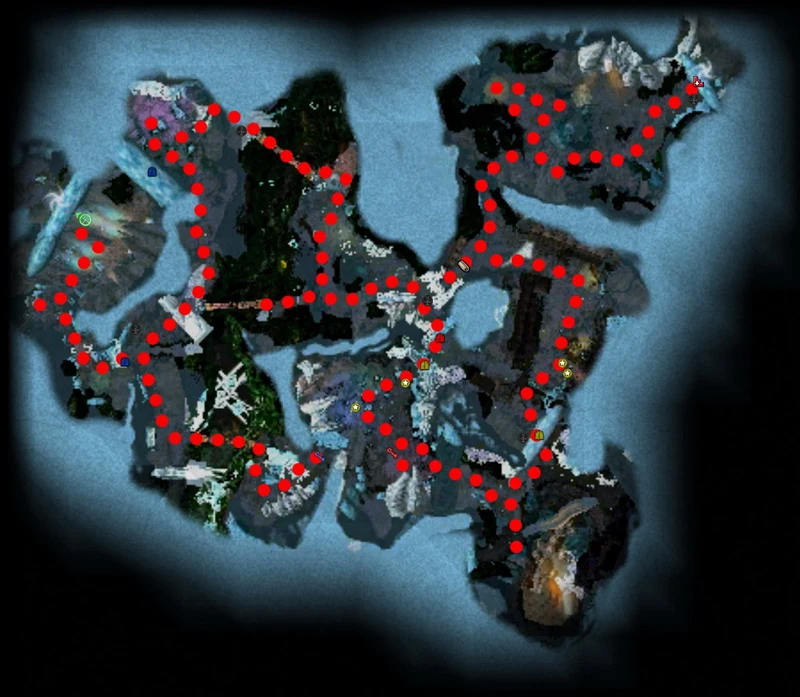
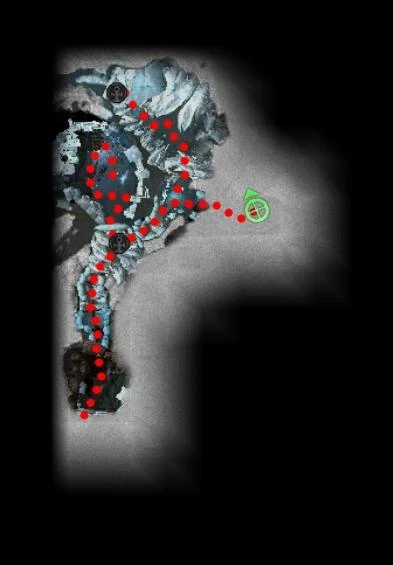
- The first level includes two walkways, one of which must be crossed to reach one of the level's keys. However, only one of the two will be lowered when you enter the dungeon. Try the southern route first (as it is somewhat shorter); if that bridge is unavailable, head north (as shown on the walkthrough map).
- The dungeon key which appears to be behind an impassable wall to the south of the lower walkway (on level 1) can be reached from a path from the upper walkway (cross the upper walkway and turn south just after the resurrection shrine). Despite all the dwarven powder kegs in this area you can not blow through the wall to get it.
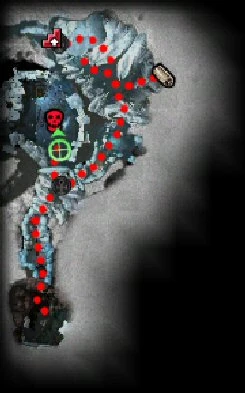
Light of Deldrimor[]
The secret area on level 3
| Type | Location | Notes |
|---|---|---|
| Level 1 | ||
| Dwarven Ghost | Next to Area Map | location |
| Hidden Treasure | Across metal bridge, between blue Dungeon Gates | |
| Hidden Treasure | Across metal bridge, beyond northenmost of the two Dungeon Locks | |
| Hidden Treasure | North of the northenmost of two blue Dungeon Gates | |
| Hidden Treasure | South of entrance to L2 | |
| Level 2 | ||
| Dwarven Ghost | Near the Area Map, in front of the broken Asura Gate | |
| Hidden Treasure | Past the Area Map, north of the ridge area | location |
| Hidden Treasure x2 | Next to entrance of second frozen zone | location |
| Level 3 | ||
| Dwarven Ghost | Next to Area Map (northeast part of room) | |
| Hidden Treasure | Just outside entrance to Havok's room | location |
| Hidden Treasure | Near the switch | location |
| Hidden Treasure | Near Havok initial location | |
| Hidden Treasure | In Havok's room, in the northwest corner | |
| Secret Switch | Southernmost room Triggering the switch allows access to a room with two more Hidden Treasures and one more Dwarven Ghost |
location |