
Bloodstone Fen Mission map
This is a mission entry. For information on the location Bloodstone Fen, see Bloodstone Fen (location).

This article has an associated Zaishen Challenge Quest.
Objectives[]
Seek the truth about the White Mantle.
- Locate Blade Scout Ryder. He'll take you to the Bloodstone.
- Use the vine bridges to traverse the jungle.
- ADDED Travel on to the Bloodstone on your own.
- BONUS Awaken the Druids while preserving their guardians.
Walkthrough[]
Primary[]
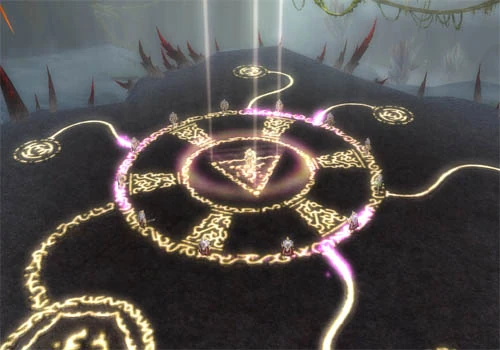
The White Mantle activate the Bloodstone
To get through this mission, you will need to collect Vine Seeds from Vine Seed Flowers in order to create Vine Bridges through the jungle. Groups of three vine seed flowers are located at points A and C on the map, and you will need to create bridges by dropping the seeds on the glowing circles at the points marked B (the blue B only pertains to the bonus). There are two bridges near point A and two near point C, so it is convenient to have at least two players in the party to avoid having to run back and forth to the flowers. Picking the first vine seed from a flower group will do nothing, but picking the second and third seeds will each cause a group of Moss Scarabs to pop out of the ground, so it is better to pick only one seed at a time to avoid being overwhelmed. At point C the scarabs will spawn a short distance away from the flowers.
- Dropping a vine seed anywhere besides the glowing circles will cause it to sprout, but it will quickly retract back into the seedcase, allowing you to pick it up again after a few seconds.
- Dropping a vine seed on a circle where a bridge has already been created will create a second bridge in the same spot, wasting the seed. Don't do this. However, there are some extra vine seed flowers to the west of point C if you somehow run out of seeds.
After crossing the second vine bridge, talk to Blade Scout Ryder (point D), who will send you on your own to defeat the White Mantle. After crossing two more vine bridges, you must defeat a few groups of White Mantle and their leader, Justiciar Hablion. The final fight with Hablion will take place on the Bloodstone itself after a cut scene, where you will be under the effects of Curse of the Bloodstone, making resurrection skills take 4 times as long to activate. Hablion is grouped with one White Mantle Knight and one White Mantle Abbot; there are also two additional groups to either side of him which consist of one Knight and Abbot. None of the groups are linked, so it is recommended to pull them separately.
Bonus[]
Do the mission as normal until you reach point A. Grab a vine seed and go back the way you came. After descending the root bridge, you should notice a path on the western wall leading up to a brown platform with an orange rune on it (point 1). Dropping a seed on the platform will summon a druid, who will ask for your aid in awakening the Elder Druid. To do so, you will need to summon three more druids by taking a vine seed (a group of five flowers is at point 2) to each of three platforms (one at each point 3). Unlike the other flower groups in the mission, no Moss Scarabs will pop up when you pick seeds from these flowers, although they do pop up randomly around the rest of the bonus area. After being summoned, the druids will convene at point 4 around a large stone platform and begin to chant. After they summon the Elder Druid, speak to it to complete the bonus.
However, you must also avoid killing any of the Jungle Guardians in the area while completing the bonus. If you do, you will anger the spirits of the jungle, causing several Ravagers to spawn for each guardian killed and preventing the other druids from appearing when you attempt to activate their platforms (more ravagers will spawn instead). Luckily, the guardians will not follow very far, so you should be able to run past them without any trouble.
When summoning the druids, the western and eastern platforms can be reached without going past any guardians (for the eastern platform, head straight east from point 2 instead of following the path on the map). There are two pairs of guardians between the seed flowers and the northern platform, though, so be careful when running the seed to it.
- If you have any heroes or pets in the party, you can simply set them to "Avoid Combat" mode to get past the guardians; be sure to disable any offensive spirits, as well.
- If you have any henchmen, however, you must use the compass flags to force them to keep moving, otherwise they will retaliate against the guardians. It is safer to plant flags on the main screen, not on the radar or mission map, because if you place a flag in an area that henchmen cannot reach, they'll stop when they reach a wall and turn to fight. The guardians have high armor, though, so it usually isn't a problem if the henchmen land a few attacks against them.
- Due to the uncontrollability of animated minions, it is strongly recommended that you let any allied minions die off and, if the minion master is a hero, disable the animation skills after summoning the first druid. Creatures created by Summoning stones are likewise uncontrollable. It is best to not use them until after completing the bonus.
- Talk to Elder Druid to complete bonus.
After completing the bonus, the Jungle Guardians will remain hostile, although they will now ignore you unless you attack them first. If continuing on with the mission, you can either backtrack the way you came, or you can continue north past the guardians and follow an alternate route (blue path on the map) to return to the main mission path. On the way, you will walk past a lone vine seed flower in the water; take the seed to create a bridge at the blue point B.
Tip: This bonus can be done solo. Most of the enemies on the way to the first druid can be run past with little trouble, and only the Wind Riders pose any real threat, due to health degeneration, enchantment removal, and interruption; however they are fragile. Bring running skills such as Sprint, Dodge, etc., as well as self-heals. Once you reach the guardian area, the rest of the bonus is rather easy as long as you are careful.
Hard mode[]
Enemies are spread out enough to not be much of a challenge, even in hard mode. The only real danger is picking too many Vine Seeds at once and being overwhelmed by the Moss Scarabs that spawn.
Moss Scarabs have Verata's Gaze, which can steal minions. Minions may also attack and kill the Jungle Guardians during the bonus, so it may be best to avoid minions altogether.
The Jungle Guardians have Barbed Trap, so don't run too close to them. Henchmen and heroes will need to be flagged carefully to keep them away from the traps.
Creatures[]
NPCs[]
- Human
 10 Chosen Villager
- 15 (20) Blade Scout Ryder
- 20 Saidra
- Spirit
- 20 Druid
- 20 Elder Druid (bonus only)
Monsters[]
- Behemoth
- 19 (25) Root Behemoth
- Centaur
- 16 (25) Maguuma Warrior
- 16 (25) Maguuma Protector
- Devourer
- 17 (25) Thorn Devourer
- 17 (25) Fevered Devourer
- Human
- 16 (25) White Mantle Knight
- 16 (25) White Mantle Seeker
- 18 (25) White Mantle Abbot
- 20 Confessor Dorian (cutscene only)
- 16 White Mantle Ritualist (cutscene only)
- 16 White Mantle Savant (cutscene only)
- Plant
- 19 (25) Jungle Guardian
- 17 (25) Thorn Stalker
- Nightmare
- 20 Ravager (failed bonus only)
- Rider
- 12 (24) Wind Rider
- Scarab
- 12 (24) Moss Scarab
- Troll
- 18 (25) Jungle Troll
Bosses - skill captures[]
- Devourer
- 20 (29) Mossk Rottail - Deathly Chill (unavailable before Maguuma Stade or The Amnoon Oasis)
- Plant
- 20 (29) Tree of Winds
- 20 Tree of Life - Scourge Sacrifice (unavailable before Copperhammer Mines)
- Watchful Spirit (unavailable before Maguuma Stade or The Amnoon Oasis)
- 20 Thornwrath - Aftershock (unavailable before Marhan's Grotto)
- Rider
- 20 (29) Hepp Bilespitter
- White Mantle
- 20 Justiciar Hablion
- 20 Torr the Relentless - Dryder's Defenses (unavailable before Marhan's Grotto)
- 20 Ramm the Benevolent - Convert Hexes (unavailable before Camp Rankor)
- Divine Intervention (unavailable before Copperhammer Mines)
- 20 (29) Oswald the Amiable - Order of Pain (unavailable before Port Sledge)
- Well of the Profane (unavailable before The Misplaced Sword at Heroes' Audience)
- 20 Nyle the Compassionate - Guilt (unavailable before The Misplaced Sword at Heroes' Audience)
- 20 Pleoh the Ugly - Searing Heat (unavailable before Copperhammer Mines)
Dialogues[]
Briefing from Blade Scout Braden.
Inside the mission[]
Saidra: If you're looking for Ryder, he's gone ahead to the Bloodstone, down in that clearing. The Mantle are taking the Chosen there right now. You'll need this, if you want to catch up. Drop it on the glowing circle to grow the bridge.
Bonus objective:
Druid: The jungle is in peril. The Elder Druid must be summoned. Awaken my brethren, the old Druids of Maguuma, the same way you woke me. They will summon the Elder Druid, but be careful. Do not harm the jungle guardians, or you will instead waken the ravagers.
Finishing the bonus:
Elder Druid: You have a kind spirit and a gentle soul. Go with peace.
Blade Scout Ryder: Look, I'm supposed to take you to the Bloodstone, but the Mantle wiped out my entire party, and I'm not going back. Go on if you want. But you should know, the stone disrupts divine energy. Those killed on top of it take much longer to resurrect.
Intermediate cutscene[]
Justiciar Hablion: I am the scythe, the Bringer of Salvation. And I shall harvest the souls of the Unbelievers. For their stench will linger. Until the false gods have been cast from this world. Well, well. If it isn't our old friends. We thought you'd been killed by the Shining Blade. But I see we were mistaken.
<party leader>: We're on to you Hablion. Your days of murdering innocent people end here.
Justiciar Hablion: I'm afraid you're mistaken. If anyone ends here, it will be you. Get them.
<party leader>: Prepare to pay for your sins, Hablion.
Ending cutscene[]
<party leader>: May your soul be lost in the endless Mists, never to find rest.
Confessor Dorian: The White Mantle have been called once again to arms. There are betrayers among us. Those who would masquerade as our friends only to turn and stab at our hearts. I have just received word that these traitors have murdered Justiciar Hablion.
White Mantle Ritualist: They must pay for this!
Confessor Dorian: Yes, my son. When these heathens attacked the White Mantle they chose their fate. Now it is for us to deliver upon them what they have asked for.
White Mantle Savant: Kill them all!
Confessor Dorian: Yes, my son. We will mete out justice and take our vengeance. Leave no stone unturned. Find the betrayers, find Hablion's killers. Kill them all.
Follow-up[]
- Upon completion of the mission players will find themselves in: Quarrel Falls, where they continue the storyline with Primary Quest:White Mantle Wrath: Demagogue's Vanguard.
Notes[]
- Players looking for a cartographer title can uncover a secluded area behind the Bloodstone. To reach this area, simply run north-east past Justiciar Hablion at the end.
- It is interesting to note that the Chosen Villagers in this mission are actually enemies. Hold down Control when triggering the second last cutscene and you will see the White Mantle spawn along with five enemy Chosen Villagers.
